Showing posts with label holiday project. Show all posts

Tuesday, December 5, 2017

Printable Holiday Gift Tags


A tradition of the Holiday Projects has always been to give out a printable holiday tag. A few years back, I was going to take a break and I heard from so many of you that it was always a tradition to print and use my tags on your gifts. I had no idea they were liked as much as they are. Ever since, I have not missed a year, I take these very seriously. This years I painted with gouache, I made them so they could be cut out and then the giver and receiver could be written on the back. It’s always fun to mix things up. I hope you like them.


Here's a pinable graphic so you can pin them and remember where they are when you need more.


Download your tags here.

Happy Sewing,


Have you visited the Pop Up Shop? 


--------------------------------------------------------------------------------------------------------------------------

Tuesday, November 28, 2017

DIY Clutch Zipper Bag

Hello! Here's a project that you can make over and over, in all sorts of fabrics. Every bag will turn out differently.

It's a great size measuring at 8" x 10" your phone, keys, and wallet will fit with room to spare.


Here's what you'll need to make your bag.

Fabrics:
Cut 2 pieces for the top 3 1/2" x 10 1/2"
Cut 2 pieces for the bottom 5 1/2" x 10 1/2"
Cut 2 pieces of lining 8 1/2" x 10 1/2"
Cut 1 piece for the handle 3 1/2" x 17"
Cut 2 pieces for zipper tabs 1 1/2" x 2 1/2"

You'll also need:
12" of ribbons and/or trim
12" zipper
1 3/4" D ring

Instructions:

1. Start by placing the right sides together of a top and bottom pieces for the bag. Align and pin one of the long sides together. Sew along this edge and press open. Repeat for the second set of top and bottom pieces.

2. If you are using ribbon or trim top stitch across the front of the bag along the seam.


If you are new to sewing zippers, here a video I created that shows you step by step.


3. Fold the zipper tab in half and press. Open up and turn the raw edges in towards the fold approximately 1/2" and press . Insert the zipper into the tab. Stitch across to secure.

4. Fold the second zipper tab just as you did the first tab. On your work table place the front bag fabric on the table. Align the sewn zipper tab with the end of the bag front. Trim the other side of the zipper so that when inserted into the tab, the length will be the same as the bag front. Sew to secure.

5. Flip the zipper over so that the zipper head is facing down, Line the edge of the zipper up with the edge of the fabric. Pin in place. Place a piece of the lining fabric, face down, on top of the pinned zipper. Make sure the outer and lining side edges are lined up. Pin the fabric in place. Using your zipper foot on your sewing machine sew using a 1/4" seam allowance. The edge of your zipper foot should line up with the edge of your fabric.

6. Keeping the fabric pulled back from the zipper as shown in the last photo, lay the zipper onto the remaining piece of outer fabric. Once again make sure that the zipper head is facing down. Line up the side edges with all three fabrics as well. Pin the zipper onto the outer fabric and then the remaining lining fabric to the zipper. The lining should be facing down as shown in the photo. Sew along this seam just as you did the first side of the zipper.


7. To make the strap, fold the fabric in half lengthwise. Open up and fold the raw edges in approximately 1/2" and press. Fold back in half again. Note: Interfacing can be added here for more stability. Stitch down each side of the strap.


8. Cut a 2" piece off of the strap. Slide the D ring onto it, align the raw edges and pin to hold. 


9. Slide the long strap over the D ring, fold over 1/2" and pin. Take the opposite end of the strap and fold over onto the pinned end. Sew across the raw edge and strap to secure. I sew a couple places to make sure the strap is sewn really well. 


10. Pin the short part of the strap approximately an inch down from the top on the front left hand side. Be sure the strap is facing inward.


11. Be sure the zipper is opened 2/3's of the way so you can easily turn it. Now arrange the bag pieces so the two outer bag pieces are right sides facing and the two lining pieces are right sides facing. Pin everything together. When you are ready to pin the zipper tabs, fold them in half. Make sure that the teeth of the zipper are facing the outer bag fabric pieces.


(Pin this)


12. Sew around all of the edges. Leave a three inch section at the bottom of the lining for turning. Clip the corners. Trim all of the excess ribbon, zippers, etc. Turn the bag right sides out. Hand stitch the opening in the lining closed. Push the lining in to the bag.


You're finished! Now when I make these bags, I sew a flower pins to go on the bag as well. If you sign up for my newsletters you'll receive the pattern for free.


I also have a book with 19 more bags to sew. You can find it here on Amazon or in my shop.


Wednesday, December 10, 2014

Fabric Postcards

Here's a fun project for you today. Did you know that you can mail fabric? I received a fabric postcard a few years back and I thought it was the finest thing to get in the mail. How about surprising some of your sewing friends with one?

I chose to make mine as a package with a bit of a modern look. You could always sew on appliqués, more trims, etc. The secret to not delaying your postcard is keeping it flat. That way it can make it through the post offices machines easily. Keeping the postcard around an 1/8" thick is best. If you got over 4" x 6" then it will be considered oversized and you'll need to add extra postage.


Here are the basics to making a fabric postcard.

Supplies:

Front and back fabric
Binding Fabric
Heavyweight Fusible Interfacing
Ribbon
Thick paper

Instructions:
1. First decide on what size you want to make your postcard. I chose to cut mine 6" x 8". Cut the front, back, and interfacing this size.

2. Iron the interfacing to the backside of the backing fabric and set aside.


3. Sew trims, appliques or whatever you would like on the front of the fabric.

4. Place the from and back side of the fabric together so the right sides are both facing outward. Sew a 2.5" binding around the outer edge of the postcard. Fold over the binding and press in place. Instead of hand sticthing the binding on, I used my machine.

Note: If you wanted to be quicker, leave off the binding and just stitch around the outside, leaving the raw edge showing.

5. Now cut a piece of paper to fit inside the binding of your postcard. Write your message and the address on the paper. You could always write directly on the fabric, but I thought it would be easier to read on paper so that's why I went this way. Topstitch the paper onto the backside of the postcard.

You're ready for a stamp!

Enjoy!


Visit my Website, Etsy Shop, Blog, Facebook

Wednesday, November 26, 2014

Applique Glasses Case


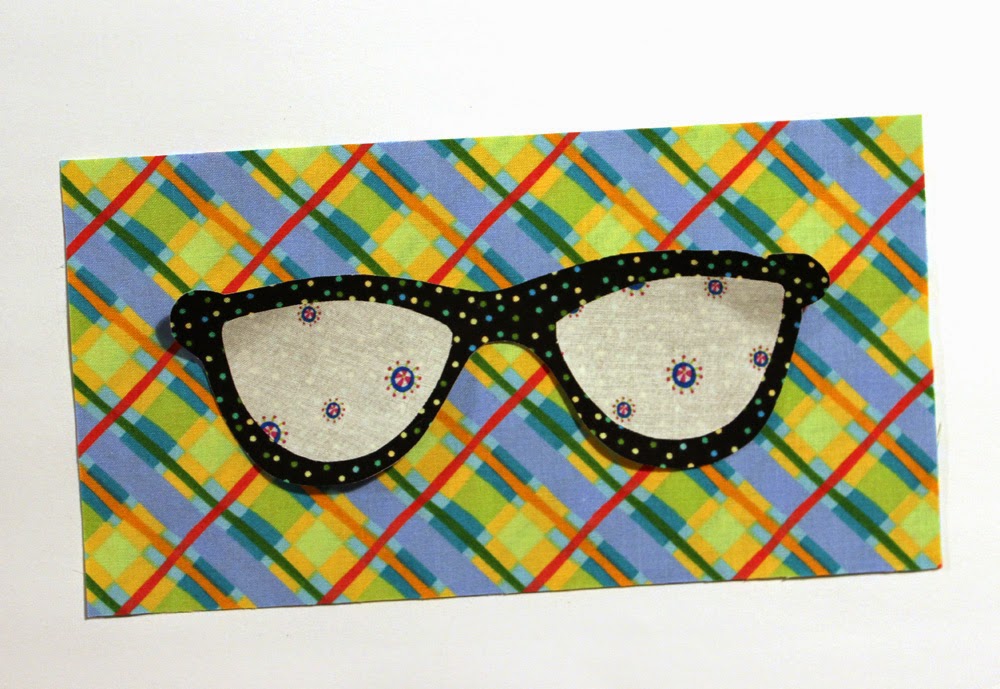
Hey Hey, so far there have been lots of holiday decorations on the blog and in the holiday projects. Today, were going to start gearing up for some gift making. Here's a case for glasses, I'm sure everyone knows someone who could use a case for their reading or sun glasses. Her's the how-to.

Supplies:
Printed glasses applique
Two pieces of cotton fabric cut to  4 1/2" x 8 1/2" for outer case
Two pieces of cotton fabric cut to  4 1/2" x 8 1/2" for inner case
Two pieces of bating cut to  4 1/2" x 8 1/2"
One piece 3" x 7" for frames
One piece 3" x 6" for lenses
Paper backed fusible webbing


1. Begin by cutting the fabric according to the sizes listed in the supplies. 

2. Trace the frames and two lenses onto paper baked fusible webbing. I used Heat n Bond Lite for the project. Roughly cut out the pieces and then iron them on to their corresponding fabrics. Cut the pieces out on the pencil lines.


3. Arrange and iron into place on the center of one of the outer case pieces. Using free motion or an appliqué stitch, sew around the fabric appliqué to secure.


4. Place the two short sides of an outer fabric to one of the lining pieces with right sides together. Arrange a pieces of batting on top of the fabric. Sew down the one short side, press open and set aside. Repeat these steps for the remaining two fabrics and batting piece.

5. Pin the two case pieces together with the outer pieces aligning and the inner pieces together. Starting on the short side of the two lining pieces, sew around the entire outer edge. Leave a 2" opening in the short side of the lining for turning.

6. Clip the corners and turn right sides out.

7. Hand stitch the opening in the lining closed.

8. Tuck the lining into the case.


Have a great day!


Visit my Website, Etsy Shop, Blog, Facebook

Wednesday, November 19, 2014

Lollipop Decorations


These lollipops were featured in Quilts and More a few years ago, just in case you're thinking they look familiar. The pattern was available through the magazine only but now I can share it with you. These are fun to make are are a great scrap buster.

If your new to sewing or piecing, this is a perfect project to try. If your center points don't line up, it's okay, they're covered with a button. There are only two pattern pieces for this project, so I do hope you sew some up.


The printable pattern pieces are here.

Supplies:
2 squares of cotton quilting fabric 10" x 10" each
1 yard ribbon
1" button
1 paper straw
Instructions:
1. Using the printed pattern pieces, cut 1 back and 4 triangles from one fabric and 4 triangles from your second fabric.
2. Start by sewing 4 sets of triangles together using two different fabrics. Make sure each set is sewn on the same side. This will insure that your pieces alternate fabrics.


3. Press the seams open. Sew two of the sets together to make a half circle. Sew the remaining two sets to make a second half circle.

4. Press open the seams. Now sew the two half circles together to make the complete front circle.  


5. Align the front and back of the lollipop together with right sides facing inward. Take a 8" piece of ribbon, fold it in half and insert the loop side in between the two fabric layers. Leaving approximately 1/2" sticking out, pin into place. Sew around the outer edge using a 1/4" seam allowance. Leave a 2" gap for turning.

6. Clip the edges and turn right sides out. Fill with fiberfill.

7. Slide the paper straw approximately 2" into the opening of the lollipop. Hand stitch the opening closed. While you're stitching, sew through the paper straws one or two times to secure.
8. Using the remaining ribbon, tie a bow at the base of the lollipop around the straw. Tack stitch in place.


9. Sew a button to the center of the lollipop. While sewing it on, send your needle all of the way through to the back of the lollipop and pull the thread snug. Do this several times to secure it.

Hope you had fun!


I've added some kits to the Jennifer Jangles Shop as well as my Etsy shop so you can have everything you need to make a lollipop decoration. 


Visit my Website, Etsy Shop, Blog, Facebook

Wednesday, November 5, 2014

DIY Holiday Ornaments


I decided that it was time to have a Christmas tree in my studio again this year. It's been awhile and now that's it's up, I have been having loads of fun making ornaments for it. First up on my lists of ornaments are todays Holiday Project number 4. These ornaments are a great scrap and trim buster. They don't take much to make and as usual, I couldn't just make one. The tutorial is at the end of this post.

You might recognize Lil Okey from my PDF patterns. I spiffed her up for the holidays by adding a bow and a piece of felt holly. Make sure to add a ribbon hanging while your sewing her if she's going to be an ornament.


The next two ornaments I made are from my new line of boutique craft kits. When I originally designed these I didn't intend them to be tree ornaments, but I have to say they fit on the tree nicely. Above is Folksy Bird and below is Happy Camper.

I have a few more ornaments on the sewing table and I bet you see those in the next few days if you keep up with my blog.

Now here's how to make the round ornaments at the top.

You'll need:
5" x 10" of cotton quilting fabric
2" x 4" gray felt
3-4 trims 6" each
8" black ribbon for hanger

Instructions:
1. Cut out pieces according to the pattern sheet. You can find it and print it here. Start by arranging one of the trims across the center of the ornament. Sew in place. From there you can decide if you want trims on the top and bottom of the center trim as well as another one across the center. I ended up using four trims for each ornament.

2. Next, align the back side of the ornament to the front. You'll want to sew around it but leave approximately a 1.5" gap. This gap should be at the top of the ornament where the cap will eventually go. 

3. Clip the curves, turn right sides out and fill will fiberfill. I didn't stuff mine too much, just enough to give them shape.


4. Arrange the two felt caps so they cover the opening in the ornament. One of the pieces should be on the front of the ornament and one should be on the back. Pin them in place. Fold the black ribbon in half and slide between the two pieces of felt and pin to secure.


5. Top stitch around the outer edge of the felt to secure everything. You're finished!

Thanks for stopping by,


Visit my Website, Etsy Shop, Blog, Facebook

Thursday, July 24, 2014

Eight Free Christmas Patterns


Are you thinking about Christmas gifts yet? I'm starting to plan out my gifts for this year. It's never too soon to start, heres a list to inspire you. Scroll to the bottom and you'll find a pin friendly image for your Pinterest page.


Enjoy!


Visit my Website, Etsy Shop, Blog, Facebook
Pin It button on image hover