Showing posts with label embroidery. Show all posts

Friday, July 22, 2016

DIY Embroidery on Clothes


Welcome to Christmas in July! I've got 8 days of projects to inspire you to get making those holiday gifts now. These gifts are great for giving at other times of the year so building a stash of ready to give gifts is another way to look at this week if you can't think about Christmas this early.

Jennifer Jangles is celebrating Christmas in July over at the website as well with 40% off all PDF patterns this week. Woohoo! Stock up on some patterns today!


Have you tried embroidering on clothes? It's a lot of fun and a great way to personalize them. You can also embroider on tea towels, pillows, just about anything.


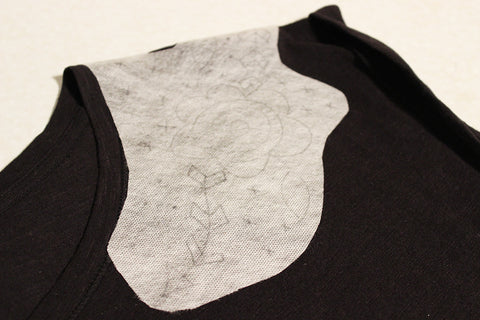
Here's the secret to getting embroidery on to clothes easily. It's wash away stabilizer. This stabilizer from C&T is my favorite, it's easy to wash out, I've found some others that don't wash out as easily.


Trace the embroidery pattern onto the stabilizer. Loosely cut around the design. Peel the backing off and place it on to the fabric.
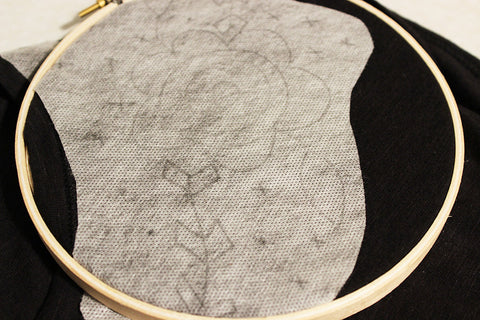

On t-shirts, I like to use an embroidery hoop to help stabilize the fabric even more since it's stretchy.
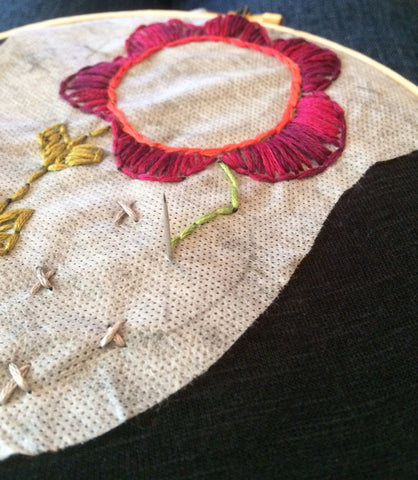
Embroider just as you would on fabric, stitching through the stabilizer.


Once you're finished, follow the instructions on the package. Basically you soak the embroidered portion of the fabric and the stabilizer disappears.

Here's a closeup of the embroidery. You can find the free pattern here.

If you need some brushing up on your embroidery skills, here are some step by steps.

If you like this project sign up for the Jennifer Jangles newsletter to receive the projects via email. I will send you these three right now when you join.


Have a great day,
-------------------------------------------------------------------------------------------------------------------------


Thursday, April 30, 2015

Embroidery Stitch A Long Recap


 How fun was the embroidery stitch a long? It was great to hear from so many of you brushing up on your stitches or completely learning embroidery for the first time.


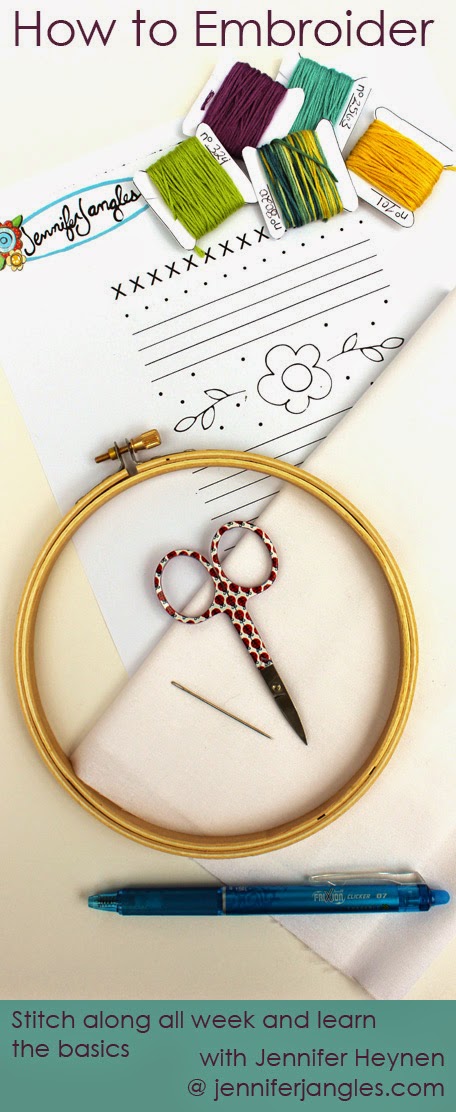
I'm going to list all of the stitches here so they can be in one place for you to refer back to. Also, scroll to the bottom and pin the image to remind yourself later when you need to refer back.


How to Embroider Stitch A Long

How to Embroider, Transferring Your Designs

How to Embroider with the Running Stitch

How to Embroider with the Back Stitch

How to Embroider with the Split Stitch

How to Embroider, The Satin Stitch

How to Embroider, French Knots

How to Embroider with Cross Stitch

Pin this!


Looking for a new project? I have embroidery patterns in my shop.


Thanks for Stitching a long!


Visit my Website, Etsy Shop, Blog, Facebook

How to Embroider with the Cross Stitch


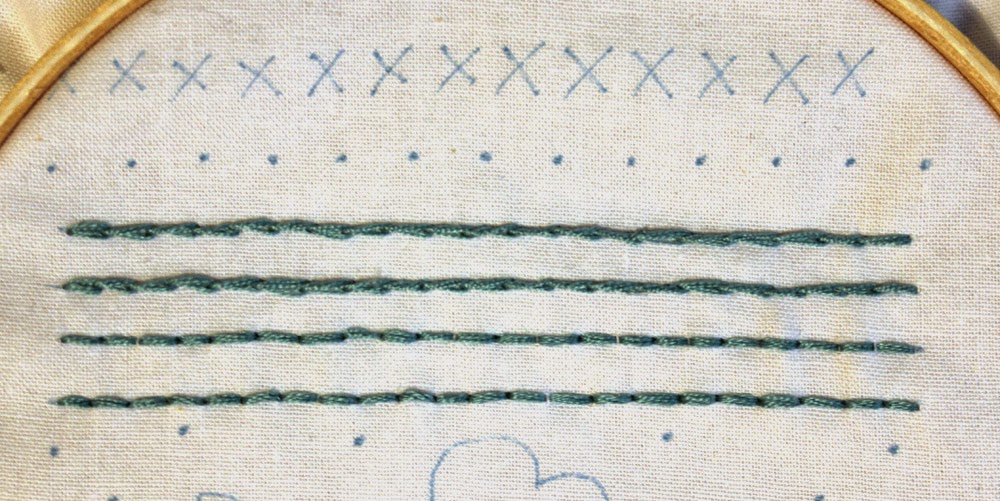
Today's stitch is an easy one. It's the cross stitch. It's basically two running stitches that are criss crossed. The only reason I added it to the sample is because there are a couple of ways to stitch multiples of them. Either way works, you can choose which is best for you.


First of all, start at the bottom left point of the "X" and bring your needle up. Send the needle back down on the opposite side of the line. 


Now this is where you can choose the method of stitching you like. You can continue across your row, stitching all of the diagonal lines the move from left to right or you can do one "X" at a time.  In the above photo I went ahead and stitch the line from right to left next and then moved on to the next "X". 


If you're doing a whole row, sometimes it's easier to stitch all of the left to rights and then go back and stitch the right to lefts. It will also insure that your right to left floss will be on top across the whole row. This gives your cross stitch a more consistent look.


Your sampler should be finished at this point, woo hoo! I really hope you had fun. Send me photos of your samplers or other projects you've stitched. Tag me on instagram #jenniferjangles with them or post them on my Facebook page. I can't wait to see what you've stitched up!

Have a great day,


Visit my Website, Etsy Shop, Blog, Facebook

Wednesday, April 29, 2015

How to Embroider, French Knots


The french knot.... I will admit this one took me some time to master. It can be tricky, but with practice you'll get the hang of where your hands should be and it will then turn in to something easy to do.

I choose to stitch my knots in purple. Here we go...


First, send the needle up from the bottom on one of the marked spots. Pull the floss all of the way through until the knot hits the fabric.


Approximately an inch above where you're french knot will be, hold the needle in one hand and with your other hand wrap the floss around the needle three times.


Here is the most important part, the hand holding the floss should continue to hold the floss, pull the floss pretty snug. The floss will slide down the needle, continue to keep the floss snug. Start pushing the needle into the fabric. At this point it should look like a knot on your needle, see the photo?


Here's a close up. If it doesn't look like this, your knot isn't going to turn out well, trust me on this. I have had to start over at this point many times.


If your needle looks like this, then send the needle all the way through the fabric. Pull the floss all the way through and you should be left with your knot.


Move on to the next one and try another.


There are loads of knots on this sampler so you'll get the hang of it and be ready to stitch anything.


Here is a graphic as well.


One more stitch and we'll have this sampler wrapped up, yay! Hope you're having fun,


Visit my Website, Etsy Shop, Blog, Facebook

Tuesday, April 28, 2015

How to Embroider with the Satin Stitch


How's the sampler coming along? Were changing floss colors today, yay! Grab your green floss and we're going to do the satin stitch. 

          
The satin stitch is great for filling in areas with color. The satin stitch is basically running stitches that are side by side. Start by pushing your needle up through the fabric on the line. Push the needle back through on the line directly across from where you came up. 


You next stitch will go right next to your first stitch. Be sure your needle is coming up and going down on the lines to keep the shape of the leaf. 


Continue stitching until you reach the other side of your leaf. Stitch all of your leaves this way. If you feel like your leaves need an outline to give them better shape you can always go around the outside with a back stitch. 


Here's the back, I just slid my needle through the floss on the back of the leaf and then trimmed it.


I used three strands of floss and the back stitch to sew the vines for the leaves. Next, switch to yellow or whatever color you chose for your flower and do the satin stitch again for the center of the flower. The outside of the flower is three strands of floss and the running stitch. Finish up the flower and vines today because tomorrow were moving on to french knots.


Have fun stitchin'


Visit my Website, Etsy Shop, Blog, Facebook

Monday, April 27, 2015

How to Embroider with the Split Stitch


How's the sampler coming along? Were starting on our third stitch today, this one is called the split stitch. It's called the because you split the previous stitch as you go. I like to use this stitch on vines it's a very organic looking stitch to me.


First off, get your needle and floss ready. Start by making a running stitch.


From the bottom, send the needle up through the fabric and split the floss strands. The needle and floss will come up in the middle of the floss.  I've got a couple views of the needle here so you can see.


You'll notice the needle comes up through the floss towards the end of the prior stitch.


When I stitched my two rows of the split stitch I started both rows from the same end, that way the stitches would run the same direction.


Here's a diagram as well.


See yo tomorrow, we'll be working on the satin stitch.
Have a great day,
Jennifer

Visit my Website, Etsy Shop, Blog, Facebook
Pin It button on image hover