Friday, November 28, 2014

Free Shipping Black Friday thru Cyber Monday


Hey, Hey, it's very rare I offer free shipping so get it while you can! Enter Holidays starting today and running thru Cyber Monday to recieve free shipping on your US orders. Sorry international fold, I can't offer you free shipping, but to make up for it, I will refund 10% off of your order once it is placed.

If you need to print out a list to plan out your holiday gifts here's a freebie.


Have a great day,
Jennifer

Visit my Website, Etsy Shop, Blog, Facebook

Thursday, November 27, 2014

Happy Thanksgiving

I hope you and your family and friends have a wonderful holiday together. We all have a lot to be thankful for. I know I am thankful for my family.


my pups,


and you. You make it so I get to do what I love everyday.

Have a great day,


Visit my Website, Etsy Shop, Blog, Facebook

Wednesday, November 26, 2014

Applique Glasses Case


Hey Hey, so far there have been lots of holiday decorations on the blog and in the holiday projects. Today, were going to start gearing up for some gift making. Here's a case for glasses, I'm sure everyone knows someone who could use a case for their reading or sun glasses. Her's the how-to.

Supplies:
Printed glasses applique
Two pieces of cotton fabric cut to  4 1/2" x 8 1/2" for outer case
Two pieces of cotton fabric cut to  4 1/2" x 8 1/2" for inner case
Two pieces of bating cut to  4 1/2" x 8 1/2"
One piece 3" x 7" for frames
One piece 3" x 6" for lenses
Paper backed fusible webbing


1. Begin by cutting the fabric according to the sizes listed in the supplies. 

2. Trace the frames and two lenses onto paper baked fusible webbing. I used Heat n Bond Lite for the project. Roughly cut out the pieces and then iron them on to their corresponding fabrics. Cut the pieces out on the pencil lines.


3. Arrange and iron into place on the center of one of the outer case pieces. Using free motion or an appliqué stitch, sew around the fabric appliqué to secure.


4. Place the two short sides of an outer fabric to one of the lining pieces with right sides together. Arrange a pieces of batting on top of the fabric. Sew down the one short side, press open and set aside. Repeat these steps for the remaining two fabrics and batting piece.

5. Pin the two case pieces together with the outer pieces aligning and the inner pieces together. Starting on the short side of the two lining pieces, sew around the entire outer edge. Leave a 2" opening in the short side of the lining for turning.

6. Clip the corners and turn right sides out.

7. Hand stitch the opening in the lining closed.

8. Tuck the lining into the case.


Have a great day!


Visit my Website, Etsy Shop, Blog, Facebook

Friday, November 21, 2014

Some Gift Ideas, Holiday Shipping Dates, and a Free Printable


Hey Hey,

I thought I would pop in a do a quick little post to get you in the know for the holidays on shipping dates, coupons, etc. Then since I needed to have some photos in this post(because a whole bunch of words would just be boring) I decided to show you some gift ideas.


First of all, Happy Thanksgiving a little early. Second, I will be spending some time with my family so shipping will be scaled back a bit. Any orders placed today until Tuesday (Nov 25th) will go out the studio door on Wednesday the 26th. Orders placed Wednesday through Sunday will go out Monday Dec 1st. Shipping will pick back up to it's normal everyday "thing" until December 23rd.


If there is ever a time when you need something quick, I am happy to upgrade shipping to something speedier, just contact me before the order and I am happy to help out.


On to gifts, it's time to get serious, so I made you this printable. You can download it and print off as many copies as you would like to make your holiday gift buying and making organized.


Have a great day,


Visit my Website, Etsy Shop, Blog, Facebook

Wednesday, November 19, 2014

Lollipop Decorations


These lollipops were featured in Quilts and More a few years ago, just in case you're thinking they look familiar. The pattern was available through the magazine only but now I can share it with you. These are fun to make are are a great scrap buster.

If your new to sewing or piecing, this is a perfect project to try. If your center points don't line up, it's okay, they're covered with a button. There are only two pattern pieces for this project, so I do hope you sew some up.


The printable pattern pieces are here.

Supplies:
2 squares of cotton quilting fabric 10" x 10" each
1 yard ribbon
1" button
1 paper straw
Instructions:
1. Using the printed pattern pieces, cut 1 back and 4 triangles from one fabric and 4 triangles from your second fabric.
2. Start by sewing 4 sets of triangles together using two different fabrics. Make sure each set is sewn on the same side. This will insure that your pieces alternate fabrics.


3. Press the seams open. Sew two of the sets together to make a half circle. Sew the remaining two sets to make a second half circle.

4. Press open the seams. Now sew the two half circles together to make the complete front circle.  


5. Align the front and back of the lollipop together with right sides facing inward. Take a 8" piece of ribbon, fold it in half and insert the loop side in between the two fabric layers. Leaving approximately 1/2" sticking out, pin into place. Sew around the outer edge using a 1/4" seam allowance. Leave a 2" gap for turning.

6. Clip the edges and turn right sides out. Fill with fiberfill.

7. Slide the paper straw approximately 2" into the opening of the lollipop. Hand stitch the opening closed. While you're stitching, sew through the paper straws one or two times to secure.
8. Using the remaining ribbon, tie a bow at the base of the lollipop around the straw. Tack stitch in place.


9. Sew a button to the center of the lollipop. While sewing it on, send your needle all of the way through to the back of the lollipop and pull the thread snug. Do this several times to secure it.

Hope you had fun!


I've added some kits to the Jennifer Jangles Shop as well as my Etsy shop so you can have everything you need to make a lollipop decoration. 


Visit my Website, Etsy Shop, Blog, Facebook

Wednesday, November 12, 2014

Thanksgiving Turkey Potholder


Thanksgiving is in just a couple of weeks and if your not hosting this year, then a hostess gift would be nice to bring along to your gathering. How about a Thanksgiving Turkey Potholder?

Here's what you'll need:
Printed Pattern, (can be found here)
1/4 yard Brown Plaid Fabric for Feathers and Backing
Scraps of Brown Wood Grain and Brown Vine Fabric for Feathers
3" x 6" Cream Dot Fabric for Body
4" x 4" Gold Plaid Fabric for Wings
1" x 1" Red Fabric
5" Ribbon for Hanger
10" x 10" Fusible Fleece
1/4 yard Paper Backed Fusible Web
Black or Brown Thread

Instructions:
1. Begin by tracing the four feathers(marked by numbers on pattern), the body, the wings, beak, and waddler onto the fusible web. Iron feather 1 and 3 onto the vine fabric and feathers 2 and 4 onto the woodgrain. Iron the rest of the pieces to the corresponding fabrics using the image above.


2. Cut out two full turkeys/full feathers from the plaid. The full turkey/full feathers is the outer line of the printed pattern. Cut one of these from fusible fleece as well.

3. Peel the paper backing off of the four feathers and arrange them onto the full turkey. It will be opposite of the pattern that you traced. Iron in place.


4. Next, iron the body, followed by the wings, beak, and waddler.

5. Iron the fusible fleece to the back of the fabric. Place the backing on top of the turkey so that right sides are facing.

6. Fold the ribbon in half and tuck the folded side in between the two layers of fabric on one side for the hanger. Pin everything in place.

7. Leaving a 3" opening at the bottom of the turkey, use a 1/4" seam allowance to sew around the outer edge. Clip all of the curves and turn right sides out. Press.


8. Using free motion embroidery or a straight stitch sew around all of the appliqués to secure. Make a smile and two eyes with the thread as well.

Happy Thanksgiving!


Visit my Website, Etsy Shop, Blog, Facebook

Friday, November 7, 2014

Daisy Hedgehog Out Takes and The Party is Tomorrow!


The Sewing Party is tomorrow, I'm so excited. I have had the privilege of getting a sneak peek into the venue and it looks awesome. It's like you're at a show, but you can stay on the couch in your pajamas. It sounds like a great way to spend a Saturday to me. 

I'll be teaching a class on how to make Daisy Hedgehog. And before you ask, I designed this pattern exclusively for The Sewing Party so you'll need to sign up if you want to get it. 


Now for the funny part, if you would like to see me making a complete fool of myself you should watch this video. When I filmed my class for The Sewing Party, I decided to put some out takes at the  end for fun. Well the folks at The Sewing Party liked them so much that they took them off the end of the video and put them on Utube. 

I will be at the party from 12:00-1:30 tomorrow , please stop by and say hello or ask questions I would love to talk.

Have a great day,


Visit my Website, Etsy Shop, Blog, Facebook

Wednesday, November 5, 2014

DIY Holiday Ornaments


I decided that it was time to have a Christmas tree in my studio again this year. It's been awhile and now that's it's up, I have been having loads of fun making ornaments for it. First up on my lists of ornaments are todays Holiday Project number 4. These ornaments are a great scrap and trim buster. They don't take much to make and as usual, I couldn't just make one. The tutorial is at the end of this post.

You might recognize Lil Okey from my PDF patterns. I spiffed her up for the holidays by adding a bow and a piece of felt holly. Make sure to add a ribbon hanging while your sewing her if she's going to be an ornament.


The next two ornaments I made are from my new line of boutique craft kits. When I originally designed these I didn't intend them to be tree ornaments, but I have to say they fit on the tree nicely. Above is Folksy Bird and below is Happy Camper.

I have a few more ornaments on the sewing table and I bet you see those in the next few days if you keep up with my blog.

Now here's how to make the round ornaments at the top.

You'll need:
5" x 10" of cotton quilting fabric
2" x 4" gray felt
3-4 trims 6" each
8" black ribbon for hanger

Instructions:
1. Cut out pieces according to the pattern sheet. You can find it and print it here. Start by arranging one of the trims across the center of the ornament. Sew in place. From there you can decide if you want trims on the top and bottom of the center trim as well as another one across the center. I ended up using four trims for each ornament.

2. Next, align the back side of the ornament to the front. You'll want to sew around it but leave approximately a 1.5" gap. This gap should be at the top of the ornament where the cap will eventually go. 

3. Clip the curves, turn right sides out and fill will fiberfill. I didn't stuff mine too much, just enough to give them shape.


4. Arrange the two felt caps so they cover the opening in the ornament. One of the pieces should be on the front of the ornament and one should be on the back. Pin them in place. Fold the black ribbon in half and slide between the two pieces of felt and pin to secure.


5. Top stitch around the outer edge of the felt to secure everything. You're finished!

Thanks for stopping by,


Visit my Website, Etsy Shop, Blog, Facebook

Tuesday, November 4, 2014

New Jennifer Jangles Boutique Sewing Kits


Hey Hey! Wanting to share something I have been working on for a good nine months now. They are a bit like babies to me. I had an idea at the first of the year about designing a line of sewing and craft kits. It started out as a selfish reason I wanted these but grew into something much bigger. Here's how it all happened....

When I travel I like to pack up boxes or bags of things to make when on the road, in a hotel, or airport. It would always take me awhile to decide what to bring and most of the time I would get on the road and then not have everything I needed. I needed a kit.

Now when I shop anywhere... quilt shops, gift shops, bookstores....etc. What do I buy? Arts and craft supplies. I usually wished there was more to buy than what I could find.

Now all of this thinking made me realize there was a need for kits. Kits that have everything, kits that were for all ages, kits that were for all sewing levels. One thing led to another and here I am, introducing to the world my line of sewing and crafting kits.


I had some very precise ideas about how I wanted everything to be and so it was an easy decision to produce these myself.

Oh boy, was it a learning curve. I designed and produced yards and yards of fabric for the kits. Really nice fabric I must say, it 100% cotton quilting fabric, washes beautifully and the colors are vibrant. Can you tell I love the mill I worked with?

My wools are hand dyed here in the US by a small company, the felts are wool blends, the thread(yes needle and thread come with) are also 100% cotton. I wanted everything top notch quality for you. That's where the word boutique comes in.


Packaging was ridiculously hard for me. I wanted small and easy to tote. I didn't want any excess packaging to save on waste down the road. But of course it had to be cute. Seriously, my printer Lisa, deserves a gold star for working with me. I could not tell you how many times she had to answer questions from me. I'm sure she's enjoying her break from me.


You might have caught a glimpse of them in my Quilt Market booth last week. I was packaging them the night before I left and they came on the plane with me. You can plan all you want but everything always ends up down to the wire for market.


But I am back and super excited to introduce you to the gang Kitty, Sophie, and more. You can see all 12 of them here.

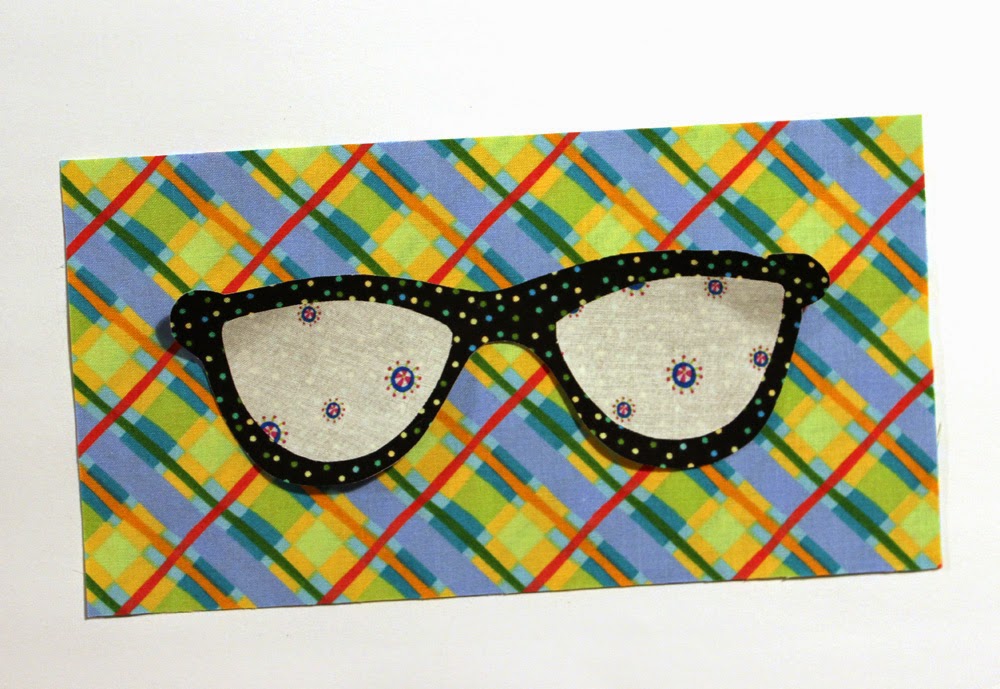
But here are a few of my favorites...


Thanks so much for taking the time to read my blog, comments really mean a lot to me and I ALWAYS appreciate it when you leave me one.

Have a great day,


Visit my Website, Etsy Shop, Blog, Facebook
Pin It button on image hover