Tuesday, December 17, 2013

New Gifts and Holiday Shipping


Hello, Hello,

Hope everyone is getting there shopping, crafting, and baking done. Uh...can't say that I am, but it's on the list for this week. I thought I would do a post on shipping dates, if you're still shopping like me. :)


The last day for shipping is Friday Dec. 20th at noon EST. Everything in the Etsy shop is in stock and ready to ship. If it's ordered before noon it will ship on that same day. Always e-mail me if you have questions, I am happy to help. The Jennifer Jangles store products are usually made when ordered, so patterns are the only thing that I can ship from there between now and the 20th.
As for shipping times, any order with a shipping fee of 4.50 or more will be shipped priority mail. Priority mail is 1-3 days, usps has a handy map now to let you know exactly when it will arrive. Anything under 4.50 in shipping fees is sent first class mail and it arrives somewhere between 2-7 days. If you need to upgrade send me an e-mail and we'll get it out sooner.


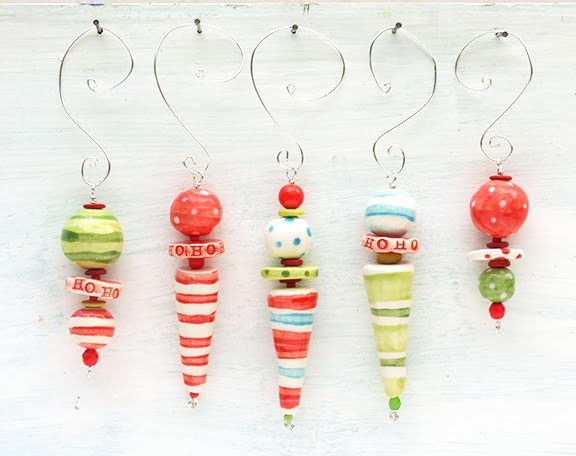
After all of those details, I can sum it up with, it's not to late to get gifts shipped, wahoo! I just added some ornaments, wall hangings, dishes, etc to the Etsy shop. I even put in four key keepers that were just featured in Stitch Craft Create as a project. 


Christmas has been marked down over at Etsy too. Jennifer Jangles Studio will be closed from Dec. 21st through Dec 26th. Orders placed during that time will ship on the 27th.

Happy Holidays!
Jennifer


Visit my Website, Etsy Shop, Blog, Facebook

Wednesday, December 11, 2013

12 Holiday Projects


Hi there, just wanted to recap the 10 uh 12 Holiday Projects of 2013. Somehow I squeezed in a few extra this year. There are tutorials for all of them when you click the links. If you weren't getting these in your inbox every week, then you need to sign up for my email newsletters that way you won't miss any of 2014's projects.


Project #3 Pom Pom Trees


Project # 5 Snowman Ornament


Project #6 Joy Wallhanging


Project #7 Stacked Ornaments


Project #10 Holly Ornament


Project #11 Ball Toy


Project #12 Snowman Mug Rug

Happy Holidays!


Visit my Website, Etsy Shop, Blog, Facebook

Holly Ornament How-To


You will Need:

1 Ceramic Holly Leaf
1 Ceramic Round Bead Red
10" Gingham Ribbon
12" of 18 gauge Silver Craft Wire

Instructions:
1. Make a simple wire loop and connect it to the loop of the holly piece and close. Trim the excess wire.
2. Slide the round bead onto the wire and make a second simple wire loop just above the bead. Trim the excess wire.
3. With the remaining wire (approximately 6-8 inches), make an ornament hook.
4. Tie a bow with the ribbon onto the ornament hook and trim any excess ribbon.

If you need help with simple wire loops or ornament hooks here are my Pinterest Friendly Instructions.


Happy Holidays!


Wednesday, December 4, 2013

Fat Quarter Gift Bags, A 15 Minute Project


A 15 minute project! I don't know about you but every year we save giftbags from Christmas. They go into our storage closet and then by the following year I am throwing them out because they are torn or wrinkled. What about making some fabric gift bags? They won't tear and if they get dirty, throw them in the washer. These instructions are for a bag made from a fat quarter but you could use any size of fabric to fit your gift. They have a french seam so they are neatly finished inside without having to line them. 

Double click on this image below and then you'll be able to print the instructions full size. And if you need Christmas fabric you can find it in the Etsy shop and it's marked down!
Enjoy!


Visit my Website, Etsy Shop, Blog, Facebook

Monday, December 2, 2013

Cyber Monday Sale


It's Cyber Monday! Just wanted to remind you of the sale going on today at the Jennifer Jangles Webstore and the Jangles Etsy Shop. 20% off everything!

The shop is loaded with gifts and supplies for gift making. And for the record...I ALWAYS buy myself a gift, just in case you see something that you can't live without for yourself.

The coupon code you'll want is Holiday20, it will work in both shops. If you want to shop from both sites or place multiple orders, I will ship everything together and refund any shipping overages.

Have a great weekend,


Visit my Website, Etsy Shop, Blog, Facebook

Friday, November 29, 2013

Black Friday Sale


It's Black Friday! Just want to let you know of the sale going on today thru Monday at the Jennifer Jangles Webstore and the Jangles Etsy Shop. 20% off everything! Woot Woot, let's go shopping!

The coupon code you'll want is Holiday20, it will work in both shops. If you want to shop from both sites or place multiple orders, I will ship everything together and refund any shipping overages.

Have a great weekend,


Visit my Website, Etsy Shop, Blog, Facebook

Wednesday, November 27, 2013

Hanging Pot Holder Tutorial


Only three more Holiday Projects left, time is flying by us. I have these potholders in my kitchen and I find them very handy. I know there are lots of potholder tutorials out there, nut here's what is different about mine. You see that button? The binding continues off of the potholder and makes a loop. It can be hung on your stove and it's right there when you need it, handy eh?

Here's what you need:

1/4 yard cotton fabric
1/8 yard cotton fabric for binding
1 button
8" x 16" batting
8" x 8" heat resistant fabric (optional)

Instructions:

 1. Cut 4 squares of fabric, 2 squares of batting, and one square of heat resistant fabric(optional) measuring  8" x 8" each.


2. Place two of the fabric squares together. Measure 4 inches down from the center of one of the corners. Place another ruler underneath that is perpendicular. This will become the pocket.


3. Cut across that perpendicular line. With right sides together, sew down the edge you just cut. Open and flip fabric around so that wrong sides are together. Press and top stitch down the edge and set aside.


4. Place a square of fabric right side down on your work surface. Place two pieces of batting on top, then the heat resistant fabric, and then the last full square should go on top with the right side facing upward. Add the pocket piece to the top of this stack. If you need to trim the edges to square thing up, do this now.

5. Cut a piece of binding measuring   42" x 2.5". Fold in half and press. Pin to the four edge of the top of the potholder starting at the corner that does not have the pocket. This will be the top of your potholder.   Sew around the edge just like you sew the binding on a quilt.


6. Turn the biding over and hand sew it to the opposite side of the potholder. Do not trim the excess binding off of the potholder.


Your potholder should be looking like this.

7. Fold the raw edge of the excess binding in 1/4" and then again another 1/4" and press.


8. Tuck the end in and make a loop that will fit around your button. Sew the end to that point on the binding.

9. Sew the button on and you are finished!

Enjoy,


Visit my Website, Etsy Shop, Blog, Facebook

Sunday, November 24, 2013

How to Make an Ornament Hook


Hey, Hey, I have had a lot of ornament tutorials on my blog over the years. (You can see some of them in the list below.) I thought it was a good idea to make up one of my Pinterest tutorials for making an ornament hook. You can print this and hang it in your studio or if you run your mouse over it, or any other image on the blog, a Pinterest "P" will show up to click on.

Some of my ornament tutorials:
Christmas Ornaments

Snowman Ornament Project

Bird Ornament

Poinsettia Ornament

Hope this helps,


Visit my Website, Etsy Shop, Blog, Facebook

Saturday, November 23, 2013

Happy Scrappy Scarf Kits


Remember these? They have been much more popular than I could have ever expected and everyone has wanted kits. I put some together over the past few days and now realize why everyone wanted kits...there are a lot of supplies involved. I put together as many together as I had supplies for. All of my vintage trim and hand dyed velveteen stashes are in these kits. Each one is different and they are in the Etsy shop right now so head on over and see if one calls your name.


Have a great day,
Jennifer


Visit my Website, Etsy Shop, Blog, Facebook

Okey Dokey Owl for Christmas


Thought I would share this version of Okey Dokey Owl with you. I sewed him with my It's Christmas! fabrics. He will make his way into my holiday decorating this year. You might have seen him in a Thermoweb ad as well, if you're thinking he is looking familiar.

Have a great day,


Visit my Website, Etsy Shop, Blog, Facebook


Wednesday, November 20, 2013

Stacked Ornaments Project and Making A Simple Wire Loop


Here's the how to for these fun stacked ornaments a.k.a. whimsical icicles. This would be a fun project to make with the kids.

Supplies Needed:

An Assortment of Beads
20 Gauge Craft Wire
18 Gauge Craft Wire

Instructions:

1. Make a spiral at the end of the 20 gauge wire.

2. Start stacking beads from smallest to largest on the wire until you are happy with your ornament.

3. Make a simple wire loop (see below) just above the last bead. Trim any excess wire.

4. Using the 18 gauge craft wire make an ornament hook (see below).


You can pin it or print these tutorials for later reference.


Enjoy!


Visit my Website, Etsy Shop, Blog, Facebook
Pin It button on image hover