Jennifer Jangles
Friday, August 26, 2016
Zoom Zoom Car Softie is Finally Here!
Zoom Zoom is finally here! It's about time too. Remember the Six Weeks of Softies contest I entered a few years ago over at the Sew Mama Sew Blog? Well you can see more of each of my three entries if you click on the pictures.
I sewed up a globe.
A mini sewing machine
and a Car and Camper
The mini sewing machine became a pattern a year ago and today Zoom Zoom is available. He's approximately 6" x 9". If you're wondering about the camper Zoom Zoom is pulling in the picture....
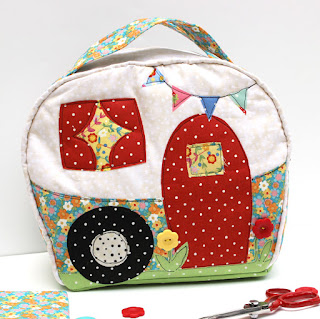
It's the Happy Camper Bag turned into a stuffed camper. The side pieces and appliques all stay the same as the bag. But instead of installing a zipper you cut a solid strip for the top. I added a couple more applique windows and stitched it together.
The wheels were sewn together and stuffed as well and then hand stitched on to the sides of the camper.
I made a little fabric strap to connect the Happy Camper to Zoom Zoom and was all finished. The Happy Camper would make a cute pillow as well.
Have a great day,
Visit my Website, Etsy Shop, Blog, Facebook
Thursday, August 25, 2016
Jennifer Jangles Top 10 Most Loved PDF Patterns
Hello! Lately, I have been working on setting up analytics and tracking systems so I can see what folks like the most in my shop and on my blog. This way I can give you more of what you want. One of the first things I checked out was the sewing patterns.
Here is a list of the top ten PDF Jennifer Jangles patterns. What do you think number 1 will be? Read on to find out.
10. PDF Sewing Traveler
Jennifer Jangles Sewing Traveler has two sizes of books. The larger book is a sewing organizer with two pockets and felt pages for storing needles as well as a strap for keeping your embroidery scissors safe. The second needle book is a smaller book great for tucking in your bag when your sewing on the go. This book has felt pages for keeping your needles.
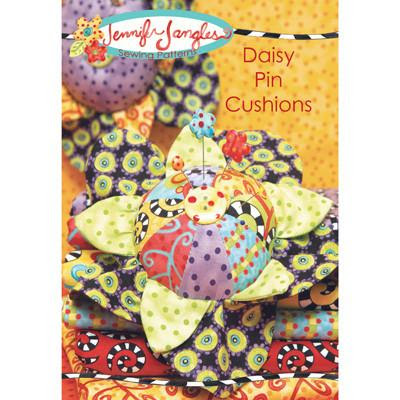
9. PDF Daisy Pin Cushions Sewing Pattern
Two different styles of pin cushions will brighten your sewing room any day of the year. As a bonus you get full instructions to make these fun standing flowers. A great gift for teachers, kids, or anyone who needs some cheer!
8. Quincy and Maggie Bear Softie Sewing Pattern
Sew up a couple of cute bears in no time. This is a great beginner project. Instructions and full size pieces are included in the pattern to Quincy and Maggie Bear.
7. Happy Birthday Cake Pin Cushion
Happy Birthday Cake Pin Cushion make a great gift for a sewer or a quilter. It can also be a toy for a child who loves to play chef. Instructions and full size pieces are included in the pattern to make a Happy Birthday Pin Cushion.
6. PDF Sew Happy Sewing Machine Softie Toy Sewing Pattern
Stuffed Sewing Machine Toy makes a great gift for a child or a fun addition to your sewing room.
5. Sew Happy Pin Cushion Pattern
A smaller version of my Sew Happy Sewing Machine is here! This smaller machine makes a great pin cushion.
4. PDF Little Ditties Bags Sewing Pattern
Make four different character drawstring bags, a crab, a turtle, a toad stool, or a cupcake. Bags are approximately 6" in height. They are drawstring bags that can hold jewelry, supplies, or gifts.
3. PDF Okey Dokey Owl and Friends Applique Quilt
Kids of all ages think Okey Dokey Owl is Okey Dokey. He stands 12" tall when finished.
2. PDF Little Love Bunny Sewing Pattern
Little Love Bunny wears his appliqué heart on his tummy, showing everyone how much he cares. Easy to sew and a great beginner project. Little Love Bunny is 9" tall including his ears.
1. PDF Class-Y Storage Sewing Pattern
Carry your bag to class and, when you arrive, unzip and roll down the top for a handy standing organizer. There is even a label holder on the front. Instructions and full size pieces are included in the pattern to make a Class-Y Storage Bag.
Have a great day,
Friday, August 12, 2016
DIY Boo Boo Helper Cold or Hot Pack - Sewing Project
When my boys were little, injuries seemed to include a lot of drama, (drama as in dramatic acting). Actually, as I think about they still do sometimes! Bandages were always needed no matter how small the scratch was. Bumps always needed ice packs. And they always were hoping for a cast or crutches. Luckily, we have only had one crutch and one cast injury over the years. We are very lucky that most injuries were very minor. But this Boo Boo helper would have come in handy.
Since my boys are grown up now, I made this for my niece and nephew. My niece Hazel is posing here with her Boo Boo Helper.
The Boo Boo Helper is filled with rice and can be kept in the freezer for bumps. Because it's rice it can also be heated in the microwave for aches. And the best part, it looks like a giant bandage.
Here's what you need:
Bandage body fabric
Bandage lining fabric
Bandage center fabric
Paper backed fusible webbing
Coordinating thread
Rice
Instructions:
1. Trace the heart and the bandage center onto paper backed fusible webbing. Cut loosely around the outside of the lines, leaving approximately 1/4". Iron the fusible webbing to the corresponding fabrics. Cut out on traced lines.
2. Iron the heart to the bandage center fabric. Iron the center fabric to middle of one of the bandage pieces. Stitch around the heart and down both sides of the fabric center.
3. Align the lining and the bandage fabric. Place the right sides together of both of the bandages. Sew around the outside using a 1/4" seam allowance. Leave a 3" opening.
4. Clip the curves and turn right sides out. Using a funnel or a spoon fill with rice. Do not overfill or the bandage won't bend easily. Hand stitch the opening closed.

Have a great day,
Thursday, August 11, 2016
How the Happy Camper Bag is Made
First things first, there is cutting pieces for the bag. The easiest way to do this is with a rotary cutter and ruler.
There are appliques that are traced onto the paper backed fusible webbing. For more on how to applique you can see this post here.
Once all of the appliques are cut out, they are ironed onto the front and the back of the camper pieces.
Here is a close up of the front.
Stitching the appliques to secure them can be done using the free motion embroidery method or straight stitching around the outside.
Next is the zipper. It's pretty easy since it's a straight strip of fabric you are adding it to. There are loads of pictures for this step in the pattern. I also have another detailed post about adding zippers here.
After the zipper is created the ends of the bag are added to each of the ends.The blue is the bottom of the camper and the green is the grass.
Handles are sewn and added to the top of the same fabric strip.
Piping is added around the front and back of the camper. The sides are pinned on top of the piping and then binding is pinned on as well. All four of those layers are sewn together.
That binding will eventually cover up all of those raw edges.
The bottom is the last piece to be added. It has either plastic canvas or Peltex in the bottom to keep it stiff. It's sewn on with the binding on the outside as well.
Now if you have ever made a quilt, the binding is sewn the same way. It is wrapped around the raw edges and hand stitched down. Wonderclips are great for keeping it in place.
Once the binding is sewn, you'll turn the bag right sides out.
The last step is to sew on the flower buttons. These buttons are from Riley Blake.
Ready to sew your own? Get your copy here.
I have seen several Happy Camper Bags on Instagram and Facebook. I would love to see yours as well!
Have a great day,
Subscribe to:
Posts (Atom)


